


Introduction
When people talk about Android security testing or malware analysis, they often jump straight into reversing, hooking, bypassing protections, or writing detection logic.
But before any of that, there is a much more basic problem: building a lab that is actually usable.
A good Android analysis lab should let you do three things well:
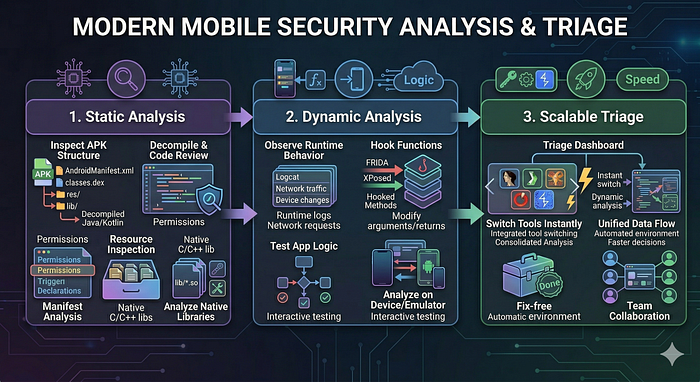
- Static analysis — inspect APK structure, manifest, resources, code, and native libraries.
- Dynamic analysis — observe runtime behavior, hook functions, and test app logic on a device or emulator.
- Scalable triage — move quickly between tools without constantly fixing your environment.
In this guide, I will show how to build a practical Android app analysis lab on Ubuntu/Debian, using a toolset that covers both security testing and malware analysis workflows.
The goal is not to install every tool on Earth. The goal is to build a lab that is stable, useful, and realistic.
If you like this research, buy me a coffee (PayPal) — Keep the lab running
Table of content
- Introduction
- Why Build a Dedicated Android Analysis Lab
- Recommended Lab Architecture
- Step 1: Install Java
- Step 2: Install the Android SDK and Platform Tools
- Step 3: Install Apktool
- Step 4: Install JADX
- Step 5: Install Frida and Objection
- Step 6: Install MobSF with Docker
- Step 7: Install Drozer
- Step 8: Install Androguard
- Step 9: Install Ghidra
- Step 10: Install Supporting Utilities
- Verification Checklist
- Common Mistakes When Building This Lab
- Final Thoughts
Why build a dedicated lab?
If you do Android security work seriously, sooner or later you will need more than just one decompiler.
A proper lab helps you:
- decode and inspect APK contents quickly
- decompile Java/Kotlin-facing logic
- analyze smali when decompilation is messy
- inspect native
.solibraries - run apps in emulators or devices
- instrument behavior at runtime
- automate repetitive triage work
It also reduces one of the biggest hidden costs in mobile research: environment friction.
Recommended lab architecture
I prefer to think about the lab in layers:
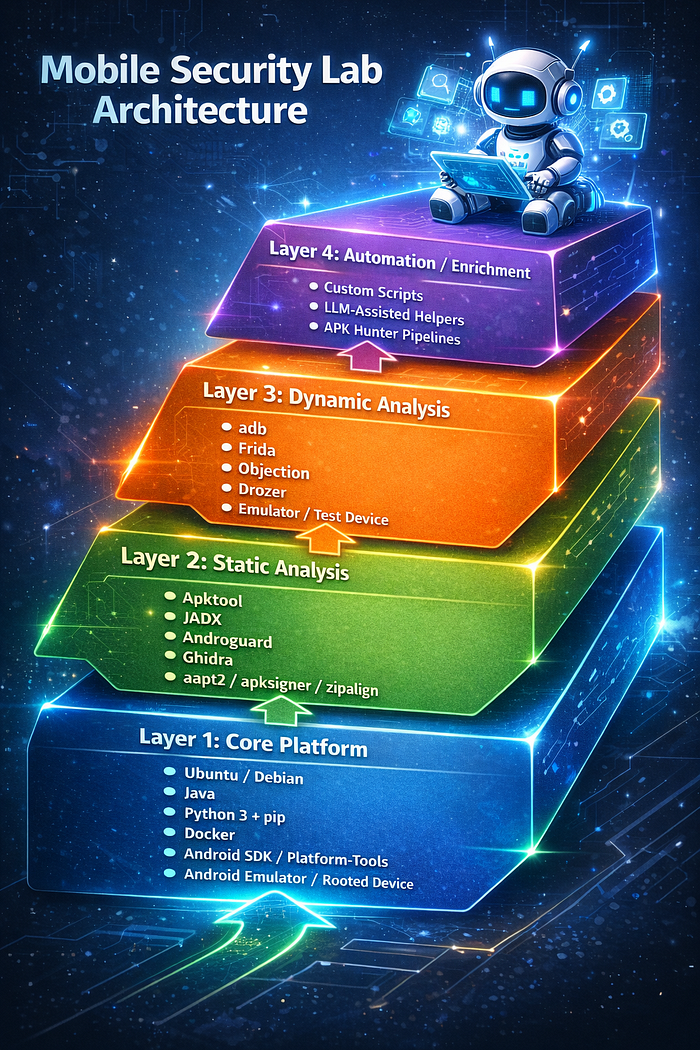
Layer 1 — Core platform
This is the base environment:
- Ubuntu or Debian
- Java
- Python 3 + pip
- Docker
- Android SDK / platform-tools
- Android Emulator or a real rooted device
Layer 2 — Static analysis
This is where you inspect the APK without running it:
- Apktool
- JADX
- Androguard
- Ghidra
- aapt2 / apksigner / zipalign
Layer 3 — Dynamic analysis
This is where you observe runtime behavior:
- adb
- Frida
- Objection
- Drozer
- emulator or test device
Layer 4 — Automation / enrichment
This is optional, but very useful:
- custom scripts
- LLM-assisted helpers
- pipeline tools such as your APK Hunter workflow
That separation matters. If one tool breaks, your whole lab should not collapse with it.
Step 1: Install Java
Many Android tools depend on Java. Google's tooling and several reverse engineering tools require it, and Ghidra also needs Java. Android Studio installation guidance is official from Google, and Ghidra requires Java 17+ in current usage guidance. (Android Developers)
sudo apt update
sudo apt install -y openjdk-17-jdk #or higher version
java -version
Step 2: Install the Android SDK and platform tools
You need adb at minimum. In practice, you usually also want the broader Android toolchain.
You can install Android Studio, which is the cleanest path because it includes the official Android development environment and gives easy access to SDK components and the emulator. Google explicitly documents Android Studio installation and notes that the Android Emulator is the preferred way to test apps across many device configurations. (Android Developers)
If you want a package-based start on Ubuntu/Debian:
sudo apt install -y android-sdkIf you install Android Studio, add your SDK paths:
export ANDROID_HOME=$HOME/Android/Sdk
export PATH=$PATH:$ANDROID_HOME/platform-tools
export PATH=$PATH:$ANDROID_HOME/build-tools/34.0.0
export PATH=$PATH:$ANDROID_HOME/emulator
Then reload your shell:
source ~/.bashrcCheck that it worked:
adb version
Step 2.1: Install Android SDK Command-Line Tools and Build-Tools
If you only install android-sdk or add Android Studio paths manually, you may still find that important tools such as sdkmanager, aapt2, and apksigner are missing.
That is because they come from different Android SDK components:
sdkmanagercomes from the Android SDK Command-Line Toolsadbcomes from Platform-Toolsaapt2andapksignercome from Build-Tools
A clean way to fix that is to install the command-line tools first, then use sdkmanager to install the required packages.
sudo apt update
sudo apt install -y google-android-cmdline-tools-11.0-installer

export ANDROID_HOME=/usr/lib/android-sdk
export PATH=$PATH:$ANDROID_HOME/cmdline-tools/latest/bin
export PATH=$PATH:$ANDROID_HOME/platform-tools
export PATH=$PATH:$ANDROID_HOME/build-tools/34.0.0
export PATH=$PATH:$ANDROID_HOME/emulator

sdkmanager --version
sdkmanager --install "platform-tools" "build-tools;34.0.0" "platforms;android-34"
sdkmanager --licenses

aapt2 version
apksigner --version
If you want these variables to persist across sessions, add them to ~/.bashrc or ~/.zshrc:
export ANDROID_HOME=$HOME/Android/Sdk
export PATH=$PATH:$ANDROID_HOME/cmdline-tools/latest/bin
export PATH=$PATH:$ANDROID_HOME/platform-tools
export PATH=$PATH:$ANDROID_HOME/build-tools/34.0.0
export PATH=$PATH:$ANDROID_HOME/emulator
Then reload your shell:
source ~/.bashrcStep 3: Install Apktool
Apktool is one of the core tools in Android reversing. It is especially useful for:
- decoding
resources.arsc - working with
AndroidManifest.xml - rebuilding apps after edits
- examining smali when higher-level decompilation is ugly
The official Apktool install guide for Linux says to download the Linux wrapper script, download the latest jar, rename it to apktool.jar, place both in /usr/local/bin, and make them executable. (apktool.org)
sudo rm -f /usr/local/bin/apktool /usr/local/bin/apktool.jar

sudo wget https://raw.githubusercontent.com/iBotPeaches/Apktool/master/scripts/linux/apktool -O /usr/local/bin/apktool
sudo wget https://github.com/iBotPeaches/Apktool/releases/download/v3.0.1/apktool_3.0.1.jar -O /usr/local/bin/apktool.jar

sudo chmod +x /usr/local/bin/apktool /usr/local/bin/apktool.jar
apktool --version
Practical note: in a blog post, I would avoid hardcoding one specific jar version unless I am documenting a known-good lab snapshot. The official release stream changes, and Apktool's latest GitHub release is newer than 3.0.1. (GitHub)
A better phrasing for the article is:
Download the latest stable Apktool release from the official install page, unless you intentionally want a pinned version for reproducibility.
Step 4: Install JADX
JADX is one of the most useful Android reversing tools because it gives you a much faster high-level view of APK logic than smali alone.
The project's official GitHub describes it as a DEX-to-Java decompiler with command-line and GUI tools, and the current release stream is newer than 1.5.0. (GitHub)
wget https://github.com/skylot/jadx/releases/download/v1.5.5/jadx-1.5.5.zip
rm -rf ~/tools/jadx
mkdir -p ~/tools
unzip -o jadx-1.5.5.zip -d ~/tools/jadx
chmod +x ~/tools/jadx/bin/jadx ~/tools/jadx/bin/jadx-gui
sudo ln -sf ~/tools/jadx/bin/jadx /usr/local/bin/jadx
sudo ln -sf ~/tools/jadx/bin/jadx-gui /usr/local/bin/jadx-gui
jadx --version
Again, for publication, I would recommend this wording:
Download the latest stable release from the official JADX releases page and unpack it under
~/tools/jadx.

That keeps the guide from aging badly.
Step 5: Install Frida and Objection
Frida is one of the most important tools for dynamic Android analysis. Its official docs describe it as a cross-platform dynamic instrumentation toolkit, and the installation guidance says the CLI tools are installed through Python with current Python 3 support. Objection's own installation docs state that pip3 install objection is typically sufficient. (frida.re)
python3 -m pip install --upgrade pip
pip3 install frida-tools objection
Check them:
frida --version
objection --help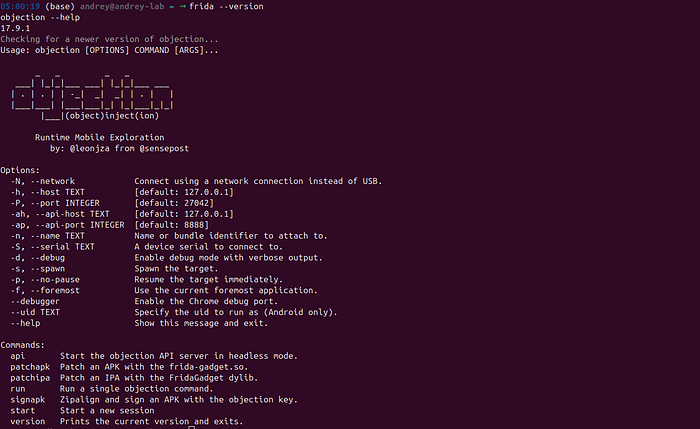
If you plan to instrument Android apps on a device, you will also need the matching Frida server or a Gadget-based workflow depending on whether the device is rooted or you are patching the app. Frida's Android documentation explicitly discusses device communication through adb and rooted-device setup details. (frida.re)
Step 6: Install MobSF with Docker
MobSF is useful when you want quick automation, especially for:
- rapid APK triage
- permissions and manifest review
- API and certificate inspection
- static findings aggregation
- dynamic workflows in a web UI
The official documentation describes MobSF as an automated all-in-one mobile application security framework, and the official Docker image is published on Docker Hub. (mobsf.github.io)
docker pull opensecurity/mobile-security-framework-mobsf
docker run -it --rm -p 8000:8000 opensecurity/mobile-security-framework-mobsf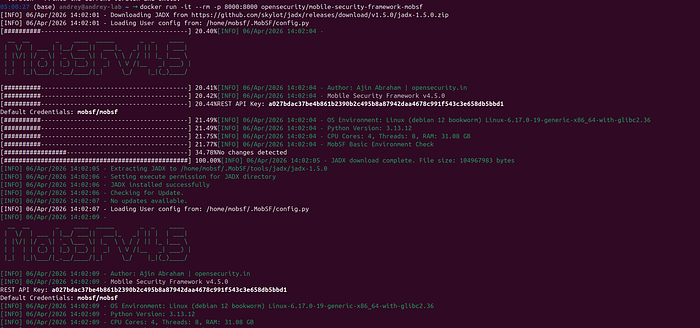
Then browse to:
http://127.0.0.1:8000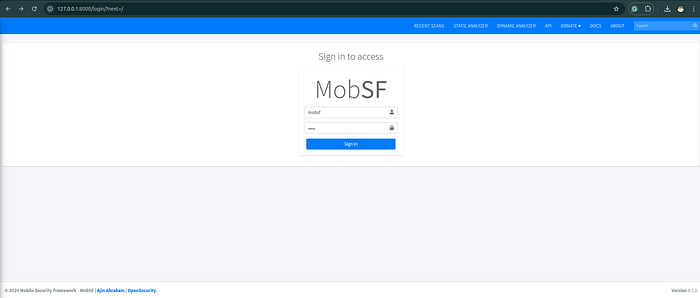
Default creds: mobsf/mobsf
Step 7: Install Drozer
Drozer remains useful for Android security testing, especially around IPC, exported components, and inter-app attack surface. Its documentation describes it as a framework that lets you assume the role of an Android app and interact with other apps and the Android runtime. Recent releases are maintained on GitHub. (GitHub)
pip3 install drozer
drozer --help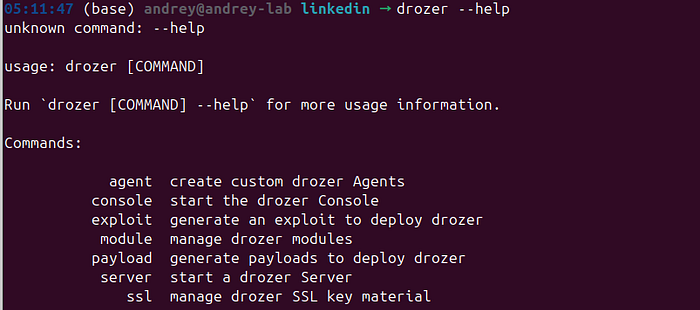
You will also need the Drozer agent APK for some workflows:
Get the agent from the official drozer releases page.
I would avoid pasting a random direct download in a Medium post unless I verify it right before publishing.
Step 8: Install Androguard
Androguard is useful both as a CLI tool and as a Python library when you want to script APK/DEX analysis. Its documentation describes it as a Python tool for working with APK, DEX, ODEX, Android binary XML, and resources. (androguard.readthedocs.io)
pip3 install androguardCheck it:
androguard --help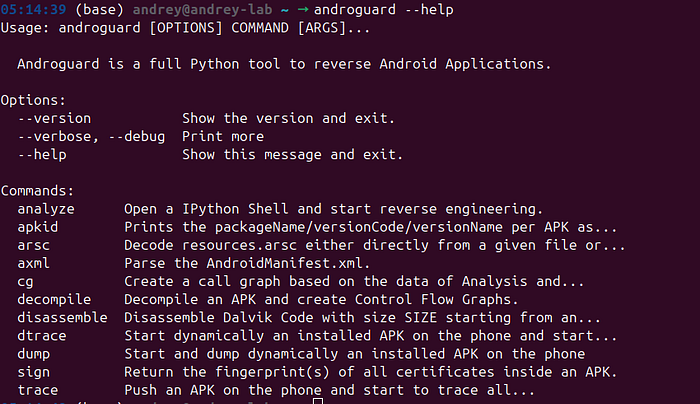
Step 9: Install Ghidra

For many Android apps, Java-level inspection is not enough. Native libraries often contain the most interesting logic:
- anti-analysis checks
- crypto routines
- jailbreak/root detection
- emulator detection
- proprietary native code
- packed or obfuscated functionality
That is where Ghidra becomes valuable.
Download it from the official site:
http://ghidra.net
http://github.com/NationalSecurityAgency/ghidra/releases
Install Ghidra if you plan to inspect
.solibraries or other native code paths.
Step 10: Install supporting utilities
Some small utilities save a lot of time.
sudo apt install -y zipalignDepending on your setup, aapt2, apksigner, and related Android build tools may already be available via your SDK installation or Android Studio environment. Google distributes these through the Android SDK toolchain. (Android Developers)
Verification checklist
After installation, confirm the lab actually works:
java -version
adb version
apktool --version
jadx --version
frida --version
objection --help
androguard --help
docker --version
Also verify that adb devices works and that your emulator or device is visible:
adb devices -lFrida's Android docs specifically recommend confirming device visibility through adb devices -l. (frida.re)
Common mistakes when building this lab
1. Hardcoding stale versions
This is one of the biggest issues in blog posts. A guide that pins old release filenames without explanation ages badly. Official release pages for Apktool and JADX change over time, so either pin deliberately for reproducibility or tell readers to fetch the latest stable release. (GitHub)
2. Mixing static and dynamic tooling without a plan
Do not install everything first and hope it works later. Build in layers.
3. Ignoring device strategy
Decide early whether you will use:
- Android Emulator
- a physical rooted device
- a physical non-rooted device with patched app workflows
Each choice changes your Frida and runtime testing setup.
4. Treating MobSF as a replacement for reversing
MobSF is useful, but it is not a replacement for manual analysis with JADX, Apktool, Frida, and native reversing tools.
5. Not documenting your own lab
Once your environment works, write down:
- package versions
- SDK location
- aliases
- adb workflows
- Frida server versioning notes
- emulator/device quirks
That documentation will save you later.
Final thoughts
A good Android app analysis lab is not about installing the most tools. It is about building an environment that lets you move smoothly between:
- APK structure
- decompiled logic
- runtime behavior
- native code
- automation
If your lab is unstable, your analysis will be slower, noisier, and less reliable.
If your lab is clean and deliberate, even difficult Android reversing tasks become much easier to approach.
The real value is not in the install commands themselves. It is in having a workflow that supports consistent, repeatable analysis.
Next stage:
If you like this research, buy me a coffee (PayPal) — Keep the lab running
Follow for practical cybersecurity research
If you're interested in Offensive security, AI security, real-world attack simulations, CTI, and detection engineering — this is exactly what I focus on.
Stay connected:
→ Subscribe on Medium: medium.com/@1200km → Connect on LinkedIn: andrey-pautov → GitHub — tools & labs: github.com/anpa1200 → Contact: [email protected]